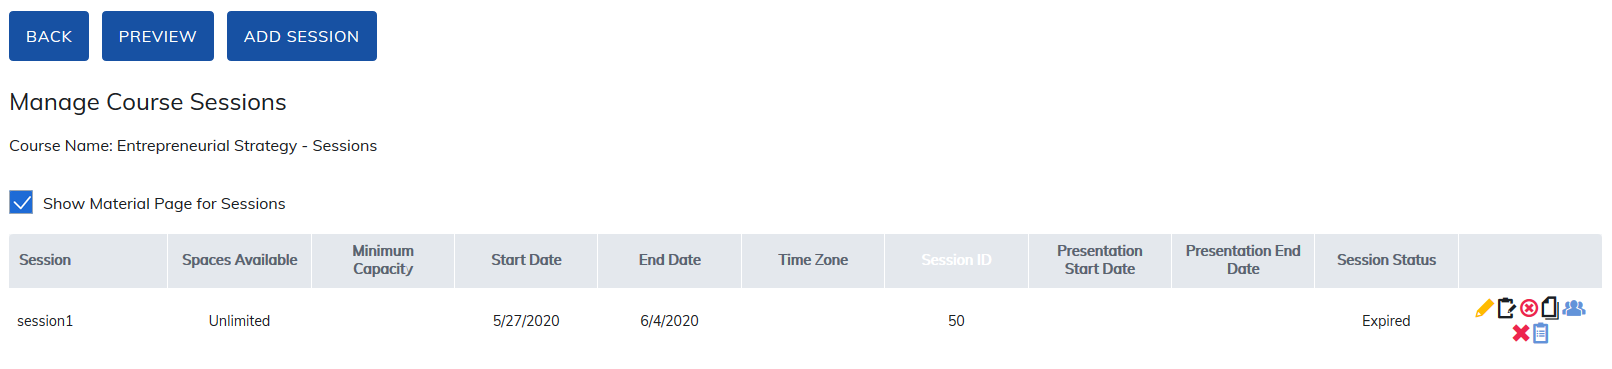
Sessions are live instructor-based training or webinars (if your site supports webinars) that can be added as a requirement to a course in your site. To add a session to a course, click Manage Course Sessions.

Next click Add Session.
If you want materials added to your session, check the Show Material Page for Sessions option.
Note: Courses with sessions cannot be used in learning paths. Courses with sessions can be used in programs, but if a course in a program has a session, you always need an active session or learners will not be able to complete their programs.
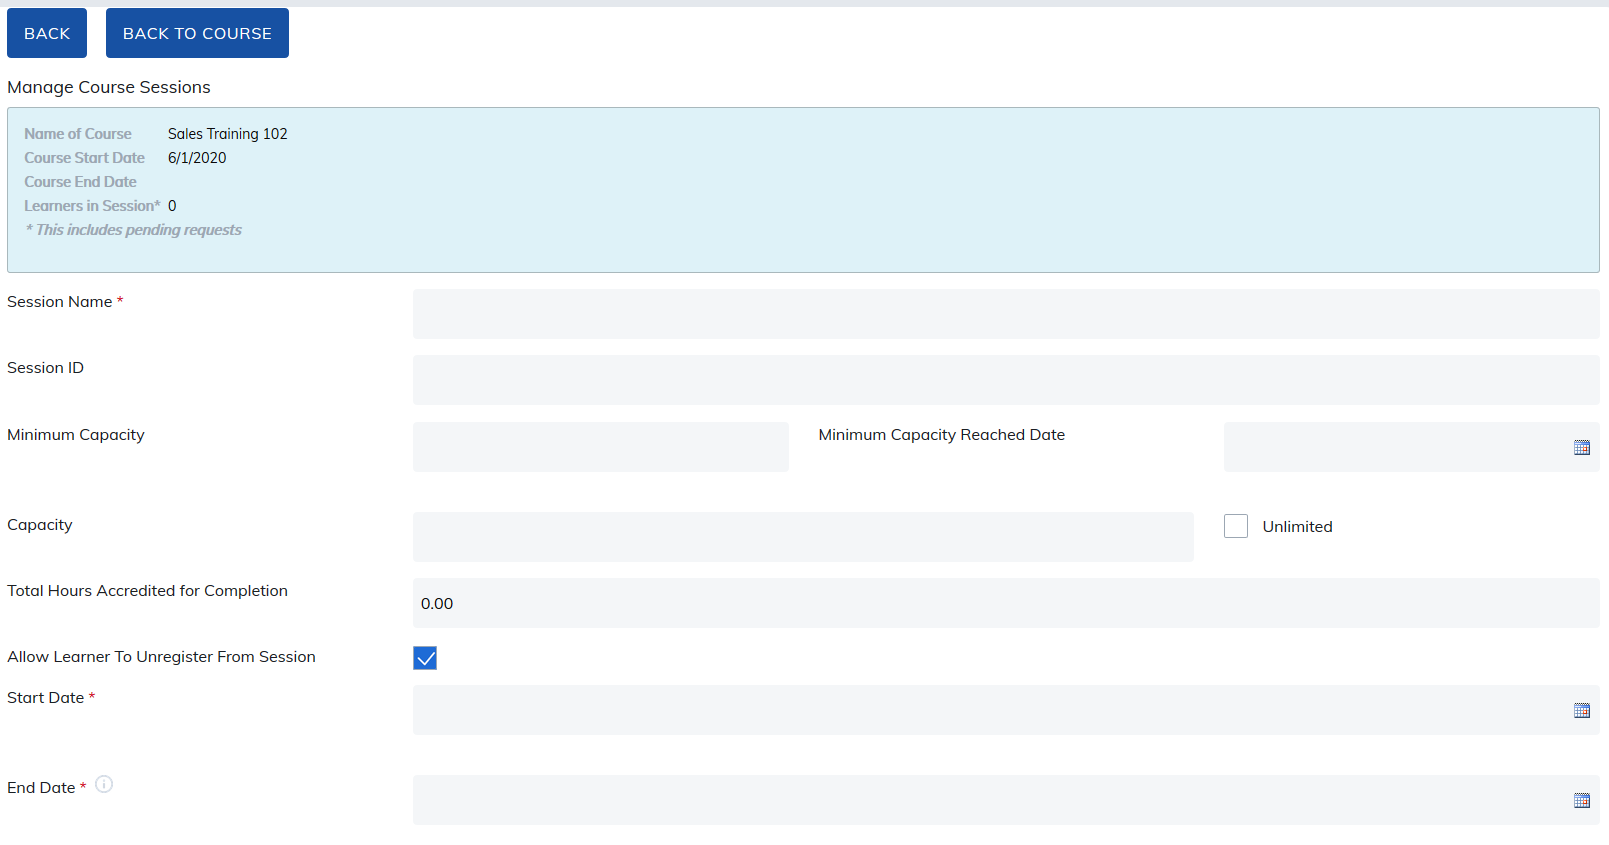
The next page presents information to enter on the sessions page.
| Field | Description |
|---|---|
| Session Name | Give the session a name you will recognize easily. You will need this name later to mark the attendance. The date of the Session is suggested. The character limit is 254. |
| Session ID | This ID will automatically populate after you create the session. |
| Minimum Capacity | |
| Minimum Capacity Reached Date | |
| Capacity | Setting a capacity will limit the number of registrants. This number can be changed later if you would like to open up additional spaces. If a capacity is not set, this will be unlimited by default. |
| Unlimited | Checkbox option. |
| Total Hours Accredited for Completion | |
| Allow Learner To Unregister From Session | Checking this box allows learners the ability to unregister after they are registered in the session. |
| Start Date | This is the date you will like the session to start. This date is required and needs to be after the start of the course. |
| End Date | This is the date you will like the session to end. This date is required and needs to be after the start of the course.
|
| Field | Description |
|---|---|
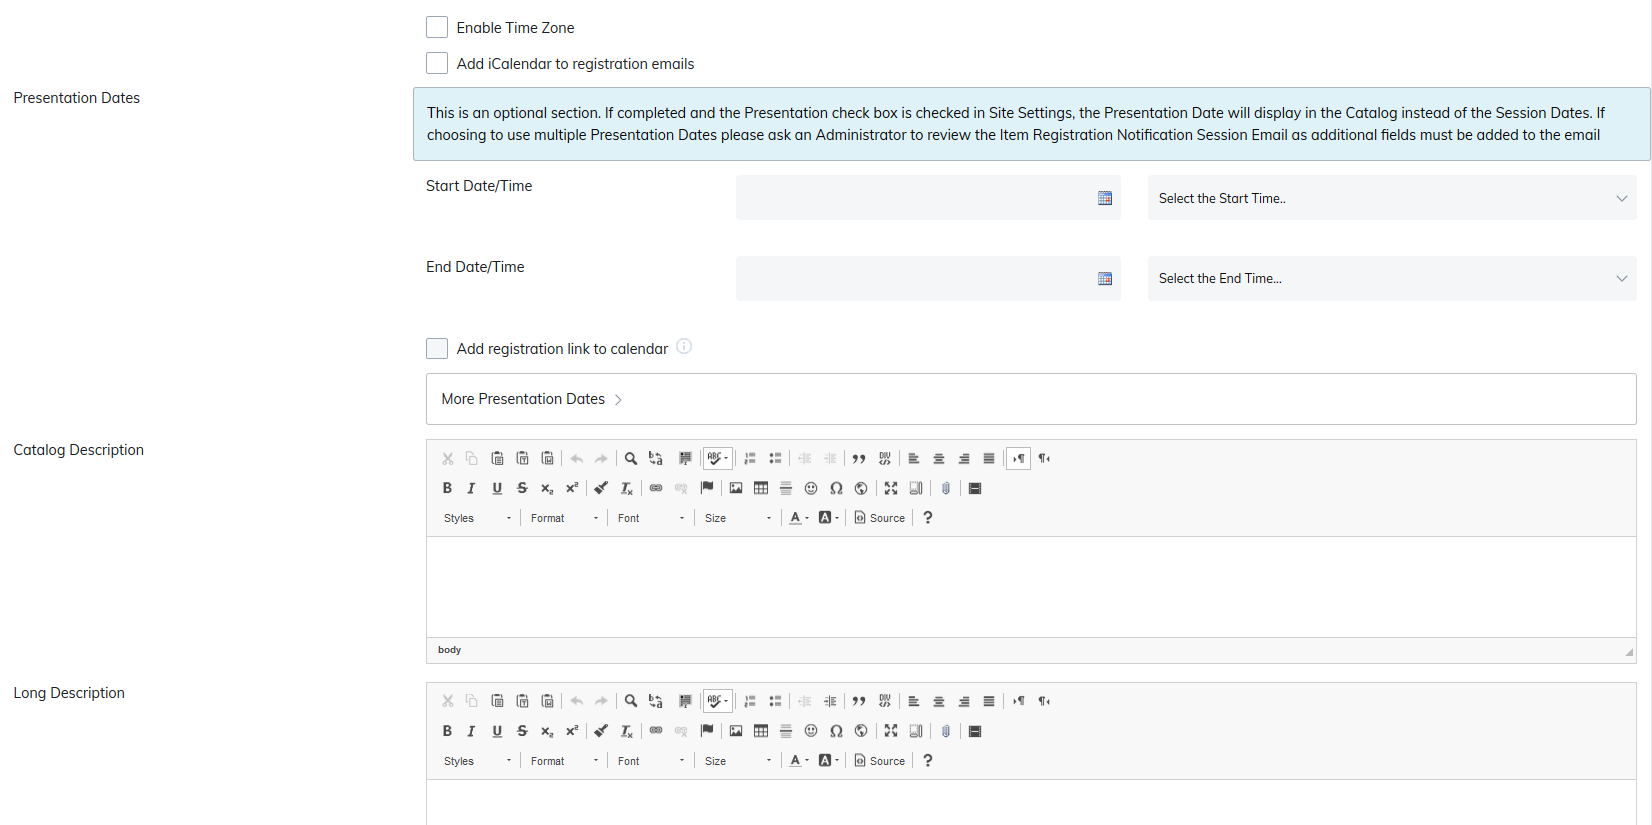
| Enable Time Zone | Check this box to pick the timezone the session will occur in. |
| Add iCalendar to registration emails | Check this box to have the iCalendar link included in the registration email for the session. Learners would then be able to add the session dates to their calendar. |
| Presentation Dates | If completed and the presentation checkbox is checked in Site Settings, the presentation date will display in the catalog instead of the session dates. If choosing to use multiple presentation dates, please ask an administrator to review the item registration notification session email, as additional fields must be added to the email. To use this functionality, enter the start and end dates and times in the boxes provided. You can have up to five presentations in one session. |
| Add registration link to calendar | This will add your session to the calendar in your TOPYX site if you are using the calendar functionality, with an option to go to the course home page to register for the session. |
| More Presentation Dates | Add up to four (4) additional dates for a total of five (5) per session. |
| Catalog Description | Add a description in this editor to appear on the catalog page. |
| Long Description | Add a description in this editor to appear on the course home page when you open the session. |
| Field | Description |
|---|---|
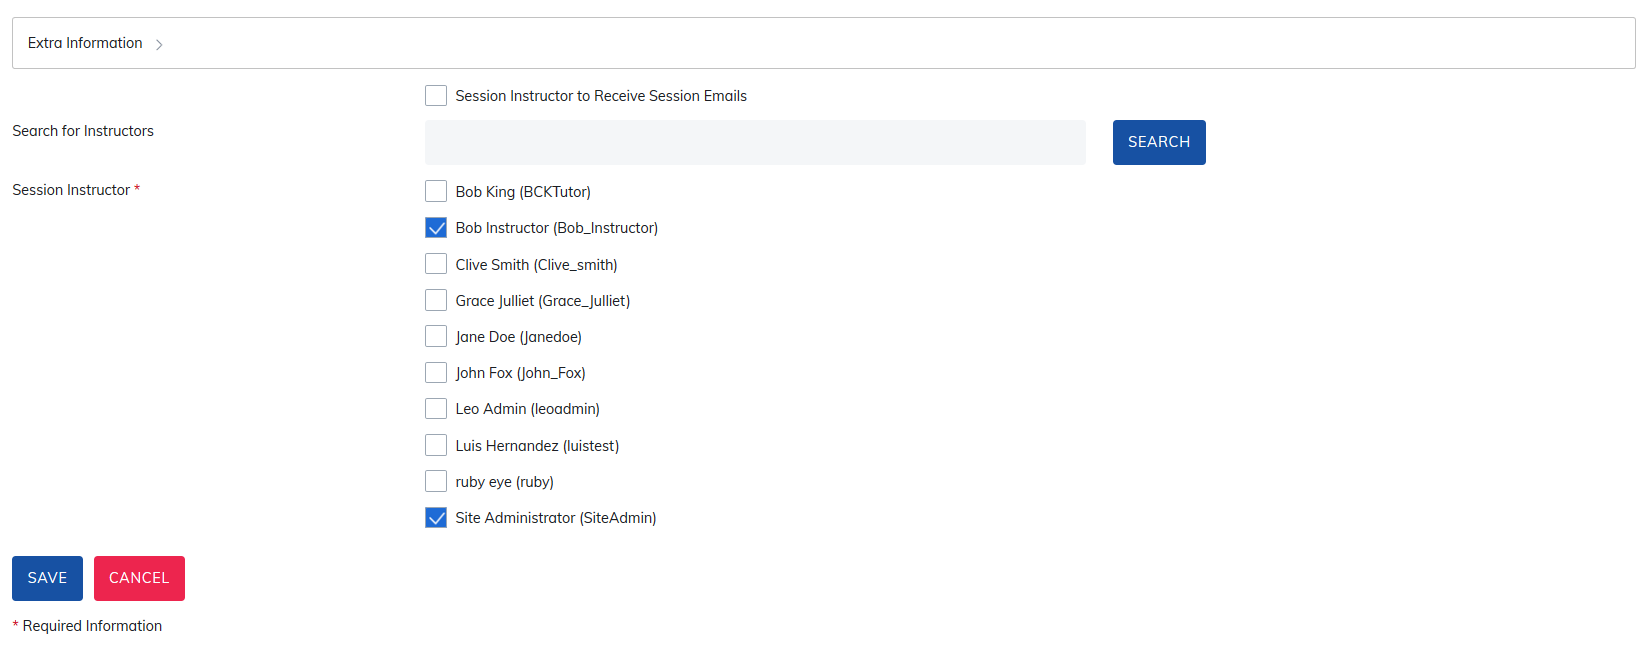
| Extra Information | Information for location, travel, hotel, dress, meals, questions, and up to two extra category fields can be added to the session. This will display when a user clicks the session name on the course home page. |
| Session instructor to receive session emails | Session instructors can be different than the course instructor. If you'd like them to receive emails relating to session activity, please check this box. |
| Search for Instructors | The search option is enabled for locating active instructors in your site. |
| Session Instructors | Designate a session instructor. |

After saving your session, you will be returned to the session listing.
Show Material Page for Session: Enable this checkbox to associate course content with the session.
Session Completions
Course completion depends on both instructor action and required materials:
- If the instructor or administrator marks a learner Passed and the course contains no required material, the course is marked complete immediately.
- If the instructor or administrator marks a learner Passed and the course does contain required material, the course is marked complete only after the learner finishes the required items.
Session Icons
- Edit Session (pencil): Allows you to modify session details.
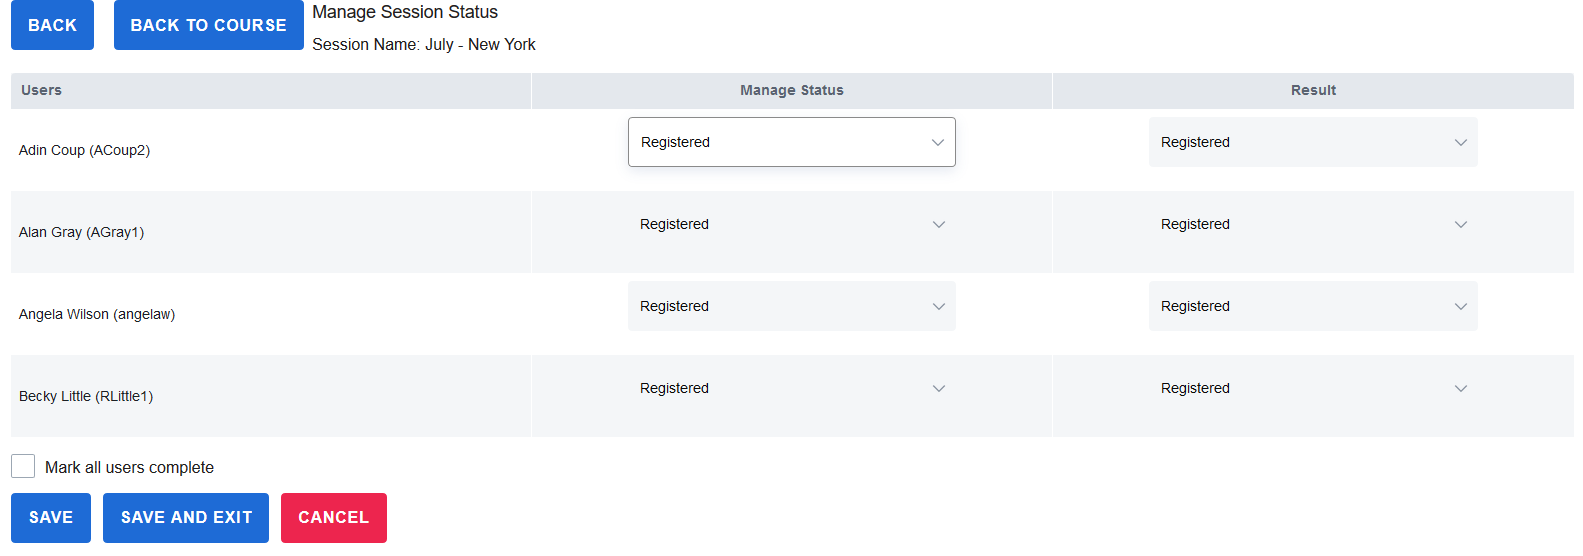
- Manage Session Status (clipboard): Opens the attendance and results screen for the session.
- Available Status options:
- Attended
- Did Not Show
- Dropped
- Registered
- Available Result options:
- Pass
- Fail
- Registered
Important: Both Status and Result must be updated to correctly record a learner’s session outcome.
Cancel Session (small x in a circle): Click this icon to cancel the session. Session status will then change to Canceled.
Copy Session (paper pages): Click this icon to copy the session.
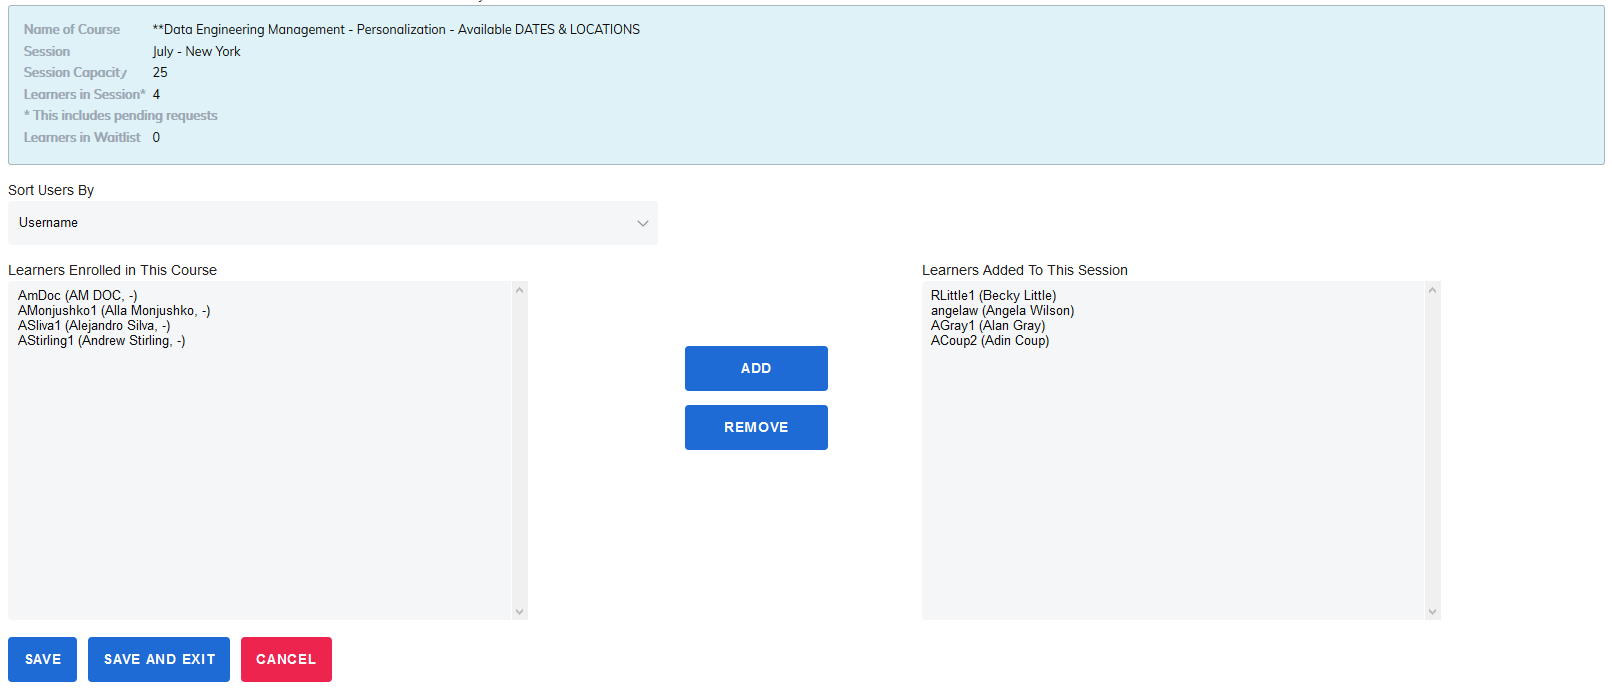
Manage Users (people): Click this icon to add users to the session. Users need to be enrolled in the course before you can add them to a session. Highlight the user, then click Add.
Delete (red X): Click this icon to delete the Session you have created.
Session Notes: Allows the admin or instructor to leave private notes about each session.
When you have made changes, click Save.
Was this article helpful?
That’s Great!
Thank you for your feedback
Sorry! We couldn't be helpful
Thank you for your feedback
Feedback sent
We appreciate your effort and will try to fix the article