The Publishing Tool, located on the Administrator Home Page, offers the ability to publish custom announcements and Calendar events across your training site.
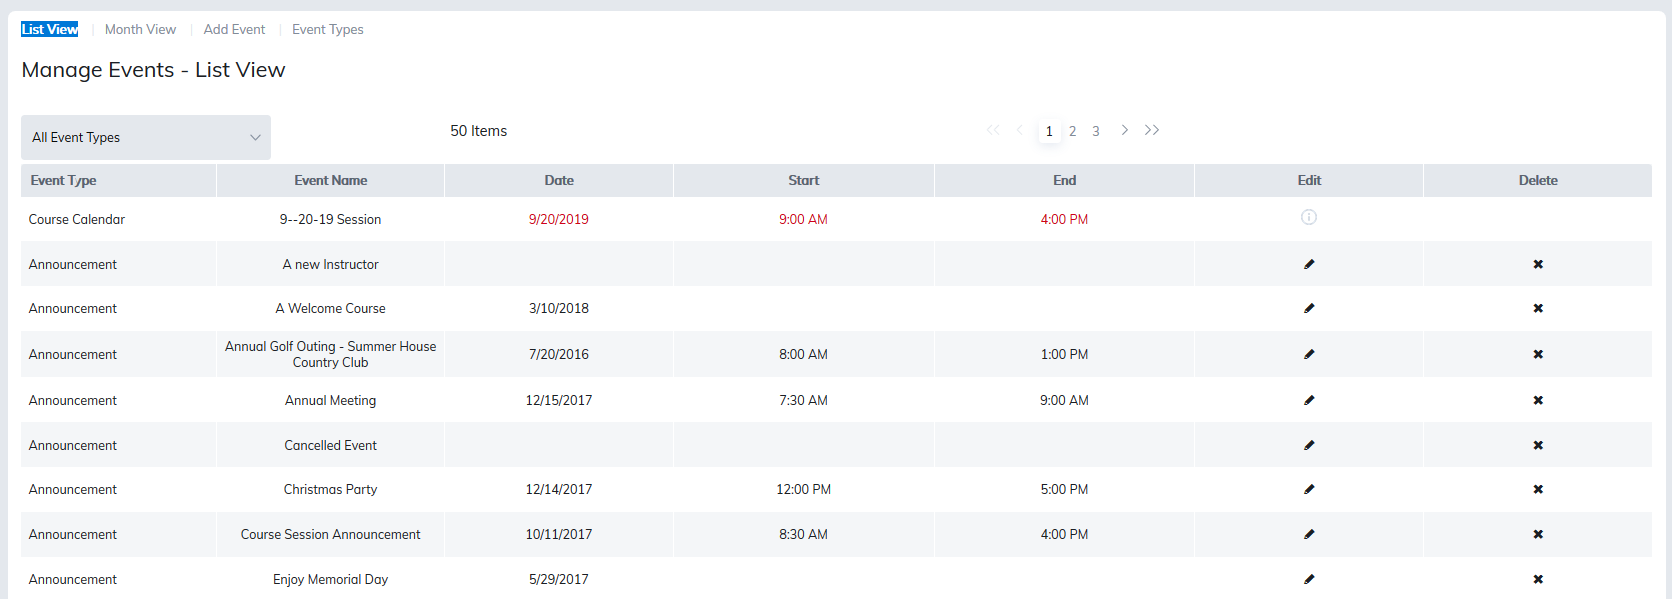
List View
Launching the Publishing Tool displays the List View of Announcements and Calendar events created on your site. You may filter by Event Type.
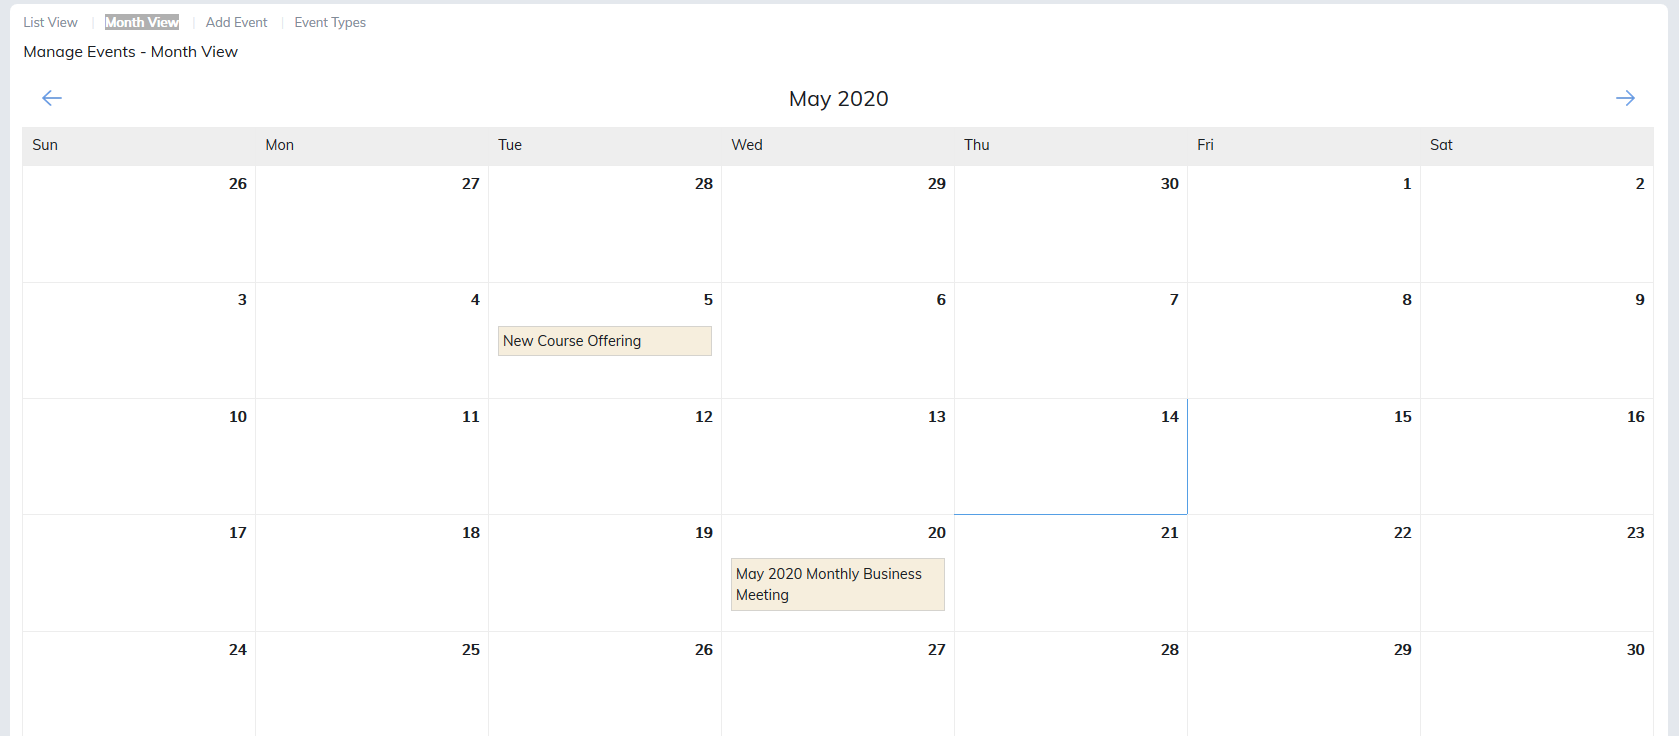
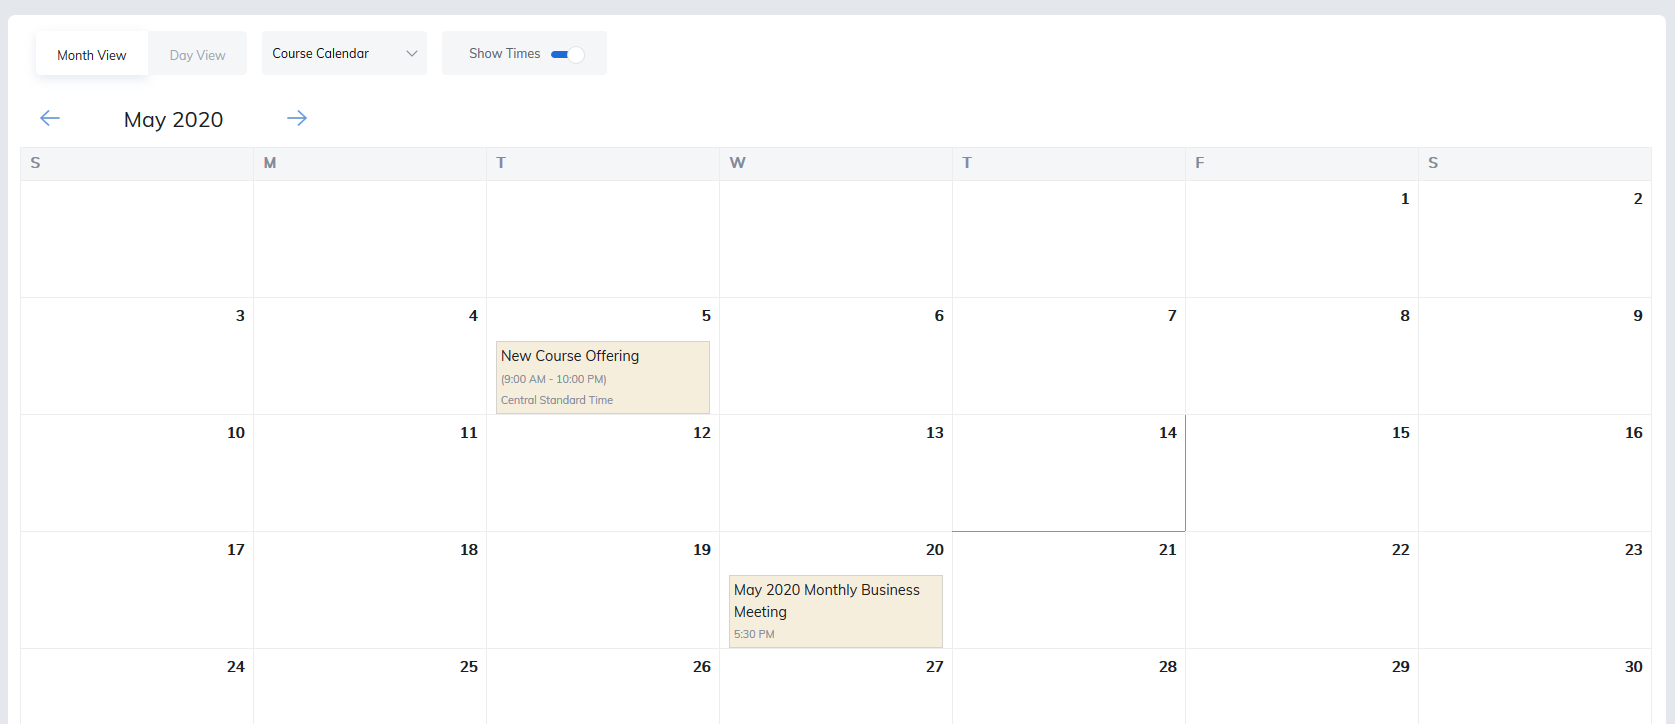
The Month View displays all Calendar entries by month.
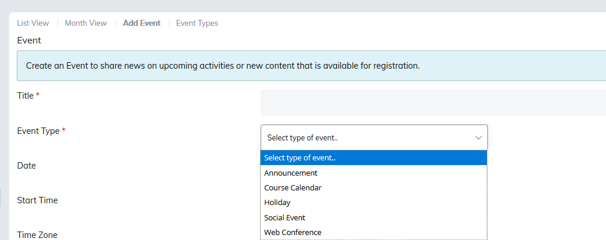
Add Event
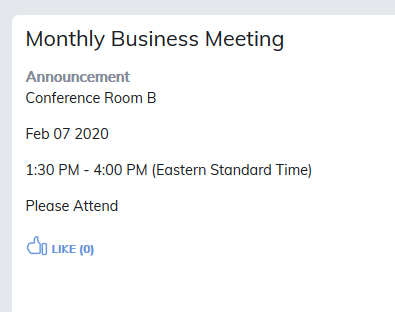
Create an Event to share news on upcoming activities or new content that is available for registration, site wide or down to a particular groups or session.
To create an Announcement or Calendar entry select Add Event.

The following fields are available:
Title: The title of the announcement or calendar event.
Event Type: Choose if you are creating an announcement, calendar event, or custom event type.
Visible To: Select the users who will receive the announcement or view the calendar entry. Options include:
- All Users
- Course Members
- Course Sessions
- Learning Path Members
- Material Members
- Program Members
- Category Community Members
- User Group Members
Date: Must be added for an event to appear on the Calendar.
Start and End Times: Times for the event.
Time Zone: Select your preferred time zone from a drop-down list.
Enable Recurring Event: If the event is to occur on an ongoing basis this option is available to select the recurring pattern, the days the event occurs and the number of weeks it will occur.

Lecturer: Optional field to add lecturer, speaker, etc.
Location: Add a location the event is occurring.
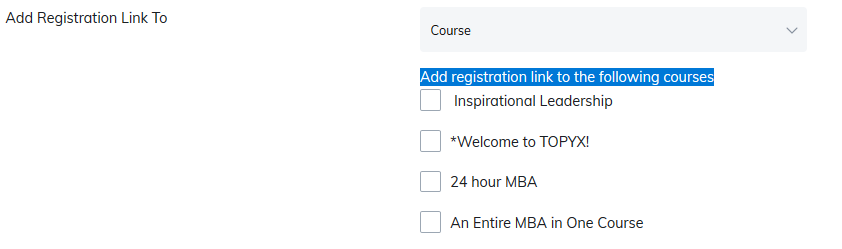
Add Registration Link To: Adds a link to Register to selected programs, courses, or materials. Please remember to click Add the Registration Link for Programs, Courses and Materials to the event.
Short Description: This will appear in the email the user receives. For announcements, this appears as a summary on the learner's profile page.
Long Description: This will appear in the email the user receives. For announcements, this appears when the learner clicks on the announcements title in their profile.
Add to Calendar: This box must be checked for the event to appear on the calendar.
Background Color: The color selected will display as the background color in the calendar for the event.
Display Locations: When creating an announcement, this allows you to publish the announcement on the profile, community home page, and send text messages (when relevant).
Note: To use text messaging, you need a Twilio account with the following settings:
Once your account is ready, share the following information:
- Twilio Account SID
- Twilio Account AUTH Token
- Twilio Phone Number
Once confirmed your site will be ready to send text messages.
Note: for your users to receive text messages they must have their mobile numbers in their profile details.
File Attachment - Find Document: Clicking the Find Document button will permit a document to be attached to the announcement or calendar entry. The following file types may be added:
- txt
- doc
- docx
- xls
- xlsx
- ppt
- pptx
- rtf
- ics
File Attachment - Clear: The Clear button can be used to remove an attached document from the announcement or calendar entry.
Notification Email: This option allows publication immediately in the site, via email or as a scheduled event. This is for both email and text.
Add iCalendar to Notification Email: Checking this box will add an option for users receiving the notification email to add the event to their Gmail/Outlook calendar.
Save: This will save the created announcement or calendar entry. The saved announcement will appear on learner profile and community pages if this option was checked. The saved calendar entry will appear on the learner calendar tab.
Note: Announcements/Events will be listed in the following order:
- Newest sticky (by creation date)
- Newest Announcement (by creation date)
Concerning where they will appear:
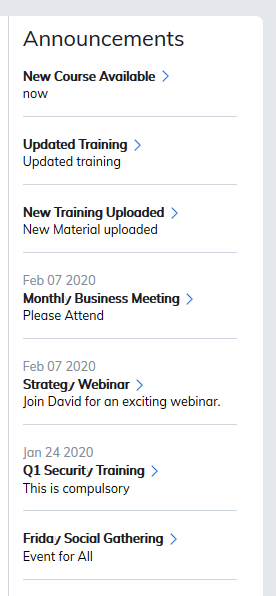
- Announcements appear on learner profile page
- Events appear in community areas
Event Types
The final link on the publishing tool navigation menu is Event Types, which list a variety of pre-created event types and allows the creation of new event types. Event types allows learners to filter the calendar to display only selected event types.
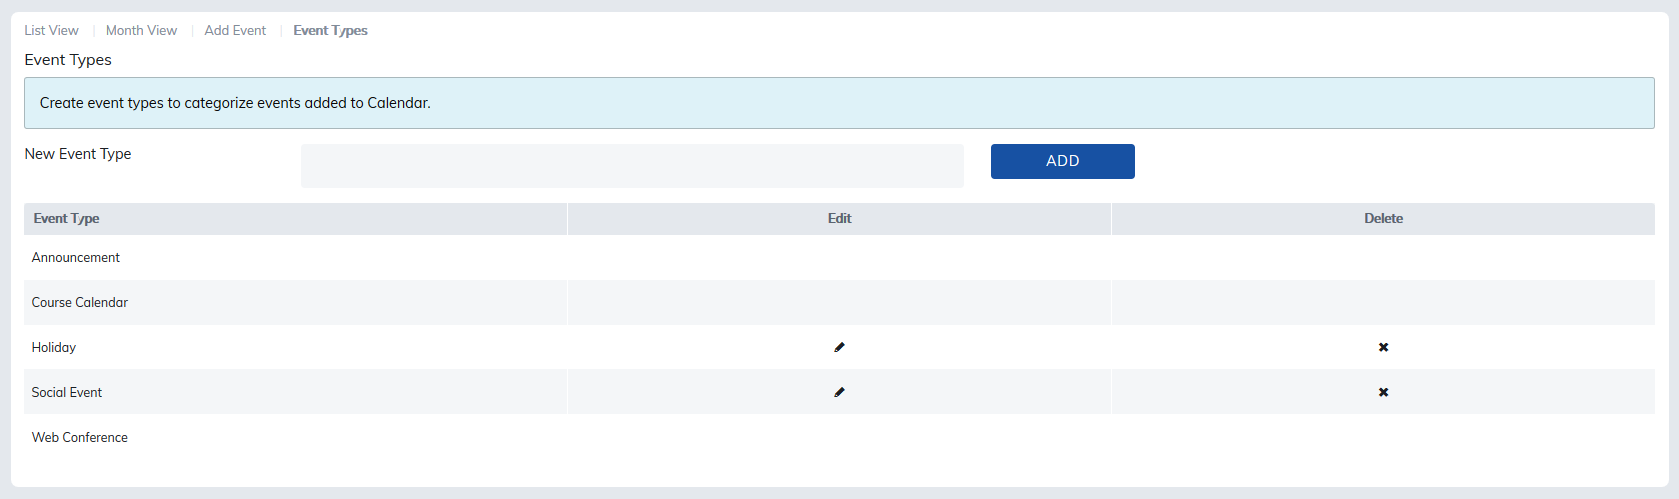
To create a new Event Type, add the name to the description and click add.
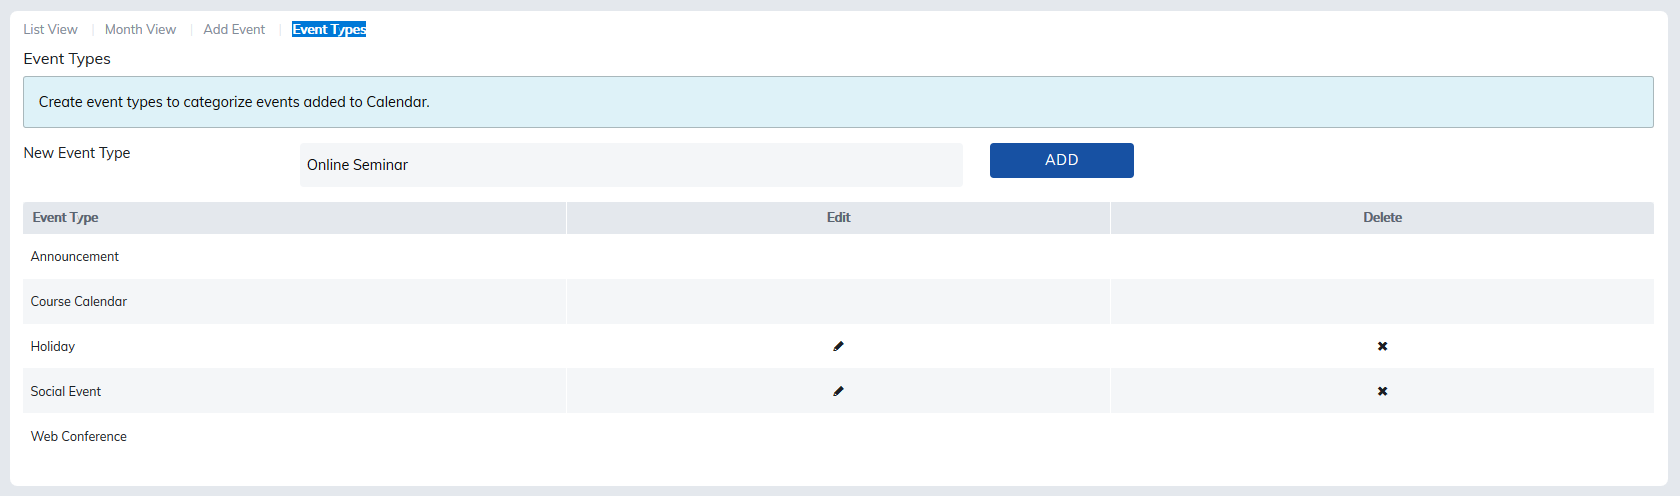
The event type name may be edited using the edit icon pencil.
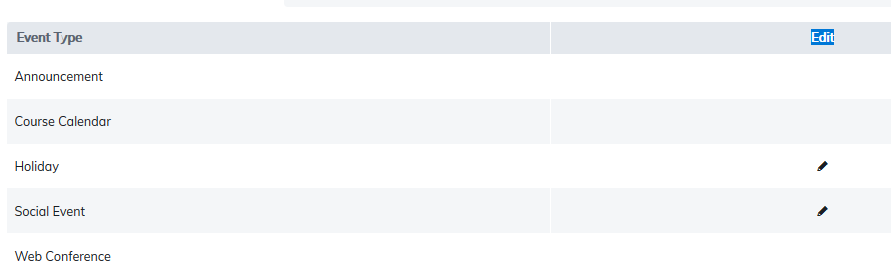
The event type name may be deleted using the delete icon.

Once an event type is created, the calendar may be created and associated with this event type using the drop-down in Add Event.
Once the event is created, learners may filter their calendar to display only events in this event type.
Was this article helpful?
That’s Great!
Thank you for your feedback
Sorry! We couldn't be helpful
Thank you for your feedback
Feedback sent
We appreciate your effort and will try to fix the article