Similar to a table of contents, Categories (subject areas) can be used to help structure published content in the catalog. To create a category, click on the Manage Categories section and select Create Category button.

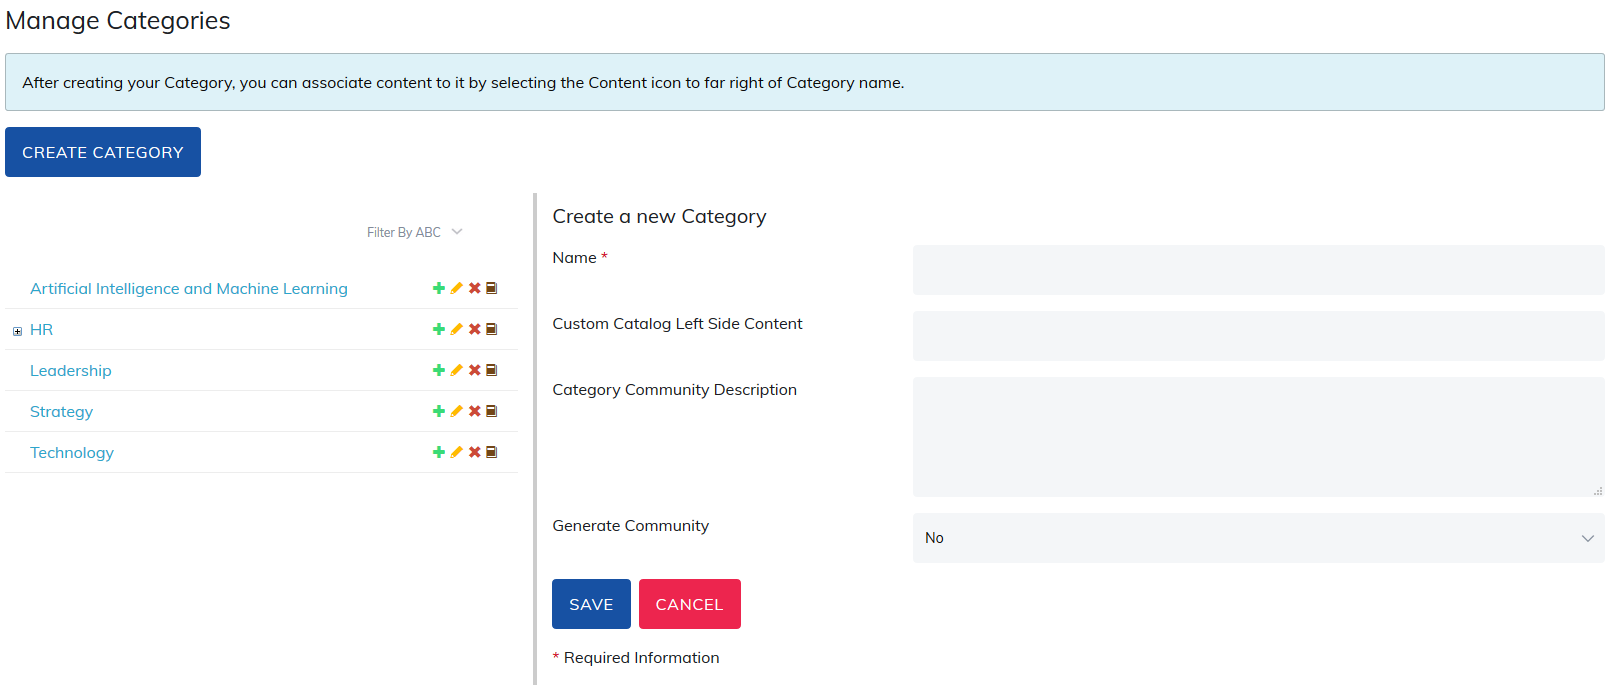
Add in category details
- Name: Add the category name.
- Code: This is an extra description field and will not display for your learners. (optional field)
- Custom Catalog Right Side Content: Add a URL link to the custom catalog image. (optional field)
- Category Community Description: If your site is using category communities, any text added in the description field will appear in category community for learners. (optional field)
After you have filled in the fields, scroll down and save your changes.
Category Icons
To the right of the main level Category there are icons.
- Add: Select the green plus icon (+) to add sub-categories.
- After these sub categories have been created, a plus (+) icon will appear to the left of the main level category. You can create any number of main and sub-categories.
- Edit: Select the yellow pencil to edit the existing category information.
- Delete: Select the red X to delete a category. Please note that deleting a main level category also deletes all sub categories.
- Content: Select the brown book icon to associate types of content to the category.
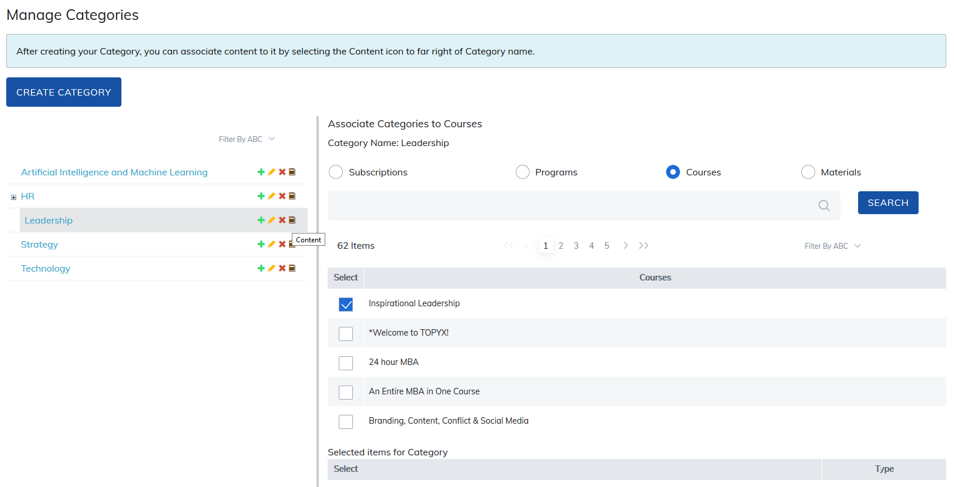
The search and keypad features apply to the current content section you are viewing. For example, you cannot search for a program when you are viewing the courses section.
A few additional notes:
- Published content that is not associated to a category will be visible to all users.
- Published content associated to a category, that is not associated to any other category, will be unpublished if the category is deleted.
- If you are using user groups and you want groups to have unique catalogs, you can use categories. Categories also roll down in groups.
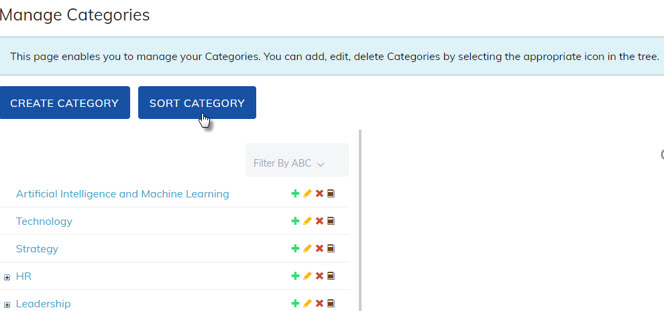
How to Change the Category Order in the Catalog
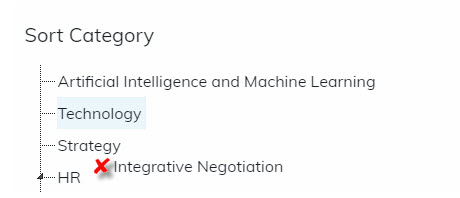
You are able to manage categories to allow administrators to choose the order categories appear in the catalog. Under Manage Categories, select Sort Category.
A list of all categories on your site will appear.
To move a category, drag it up or down the category list. The option can also be used to change the parent category, make the category a child, or make it a parent.
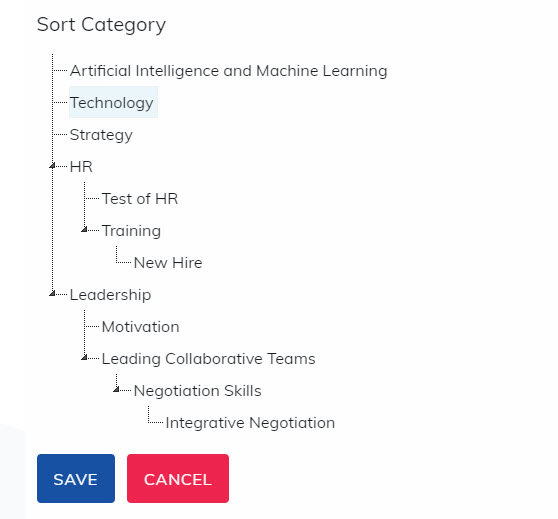
A green check mark will appear noting the category can be dropped in the selected spot.

A red cross will appear if the category cannot be dropped there
Once all changes are made, select Save to save changes or Cancel to cancel the changes.
The updated category order will appear in the catalog and in Manage Categories. The categories will remain in alphabetical order when creating and editing subscriptions, programs, courses, and materials.
Was this article helpful?
That’s Great!
Thank you for your feedback
Sorry! We couldn't be helpful
Thank you for your feedback
Feedback sent
We appreciate your effort and will try to fix the article