This page lists all users on your site with options to add new users and edit existing users.

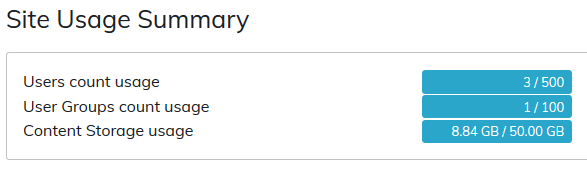
- TOPYX Expanded sites support unlimited users
- TOPYX Essentials sites support 2000 active users - users not roles assigned to the user
- TOPYX Elements sites support 500 active users - users not roles assigned to the user
For Essentials and Elements sites there is a counter area on your sites at the top right side. Only administrators see these details.

Adding Users
To add a user, click Add User.

A sign-up page will appear listing all available user fields. The fields that are required will be marked with a red asterisk.
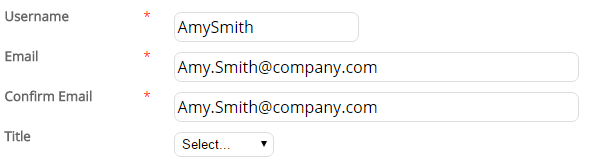
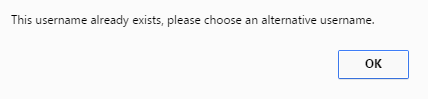
Username is the only unique identifier in your site. All users must have unique usernames. Please consider this when adding users.
The site requires the following fields to create users.
- Username: The username must be unique. Do not include commas, spaces or apostrophes in username. You may use letters, numbers, @, hyphens ( - ), and underscores ( _ ). Usernames may be email addresses.
- First Name: Can only contain letters.
- Last Name: Can only contain letters.
- Email: If a user on the site does not have an email address when they sign up, the system can automatically put in a generic email address such as training@sitename.com before saving the user’s log-in account details. This can also be done on the import files.
- Password: Enter a password for the account.
- Role: You must select a role for your user when creating users as an administrator.
All other fields are not required unless an administrator has designated these fields as required for your site using User Sign-Up Options.
Once complete, click Register to create the user. If the user cannot be created, a warning message will notify you the reason why.
Filtering Users
Landing on the Manage Users page will display all the users on your site.
Users will be listed over multiple pages. Clicking on the ABC filter and selecting a letter will display only usernames starting with this letter. Clicking the numbers or arrows allow you to move page by page.
A user group filter is available if you only want to display users within a user group. Select the user group you wish to view from the drop-down menu.

Searching for Users
Users may be searched by their:
- First Name
- Last Name
- User Name
Type the information into the relevant field and click Search to find users with the first name, last name, username, and/or email.

Impersonating a User
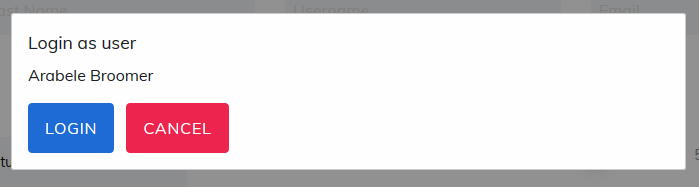
To Impersonate a Learner, click on the key symbol. Administrators may login as learners through this impersonation feature.

A message will appear asking if you wish to login as this user. Click Login.
Once logged in a message will appear on the left confirming the administrator is logged in as this user.
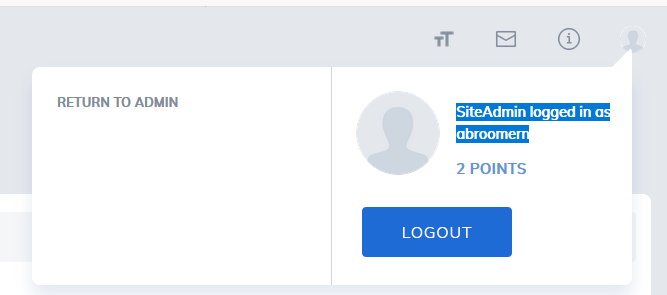
The administrator will now be able to view the user’s profile, catalog, and reports. The administrator can logout from this user by clicking on Return to Admin. The administrator will be returned to the Manage User page.
There is a report in Administration Reports, Impersonation Report.
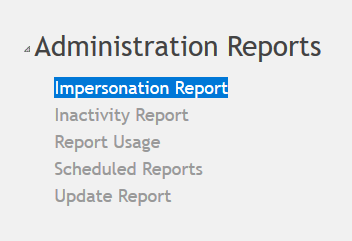
The report will display a log all administrators who have logged in as other users, when, and how long they were logged in for.
Please note, if an administrator logs in as another user, closes their browser, and forgets to log out, the site's timeout limit will be displayed as the length of time the administrator was logged in as this user.
Resend the Registration Email
To resend the user site registration email, click on the envelope symbol.

Confirm the request by clicking Send.

The user will be sent the user registration email.
Please note: Re-sending the user registration email will change the user’s password.
Merge User
To merge a learner, click on the people symbol. Users may have accidentally created duplicate accounts that need to be merged together.
Please note: Choosing to merge users cannot be reversed. To merge the accounts together, an administrator selects the Merge User icon to the right of the primary account. This is the account the duplicate will be merged into.

This account will be the primary account. The administrator types the first or last Name into a search box to find the duplicate user to be merged into this user.
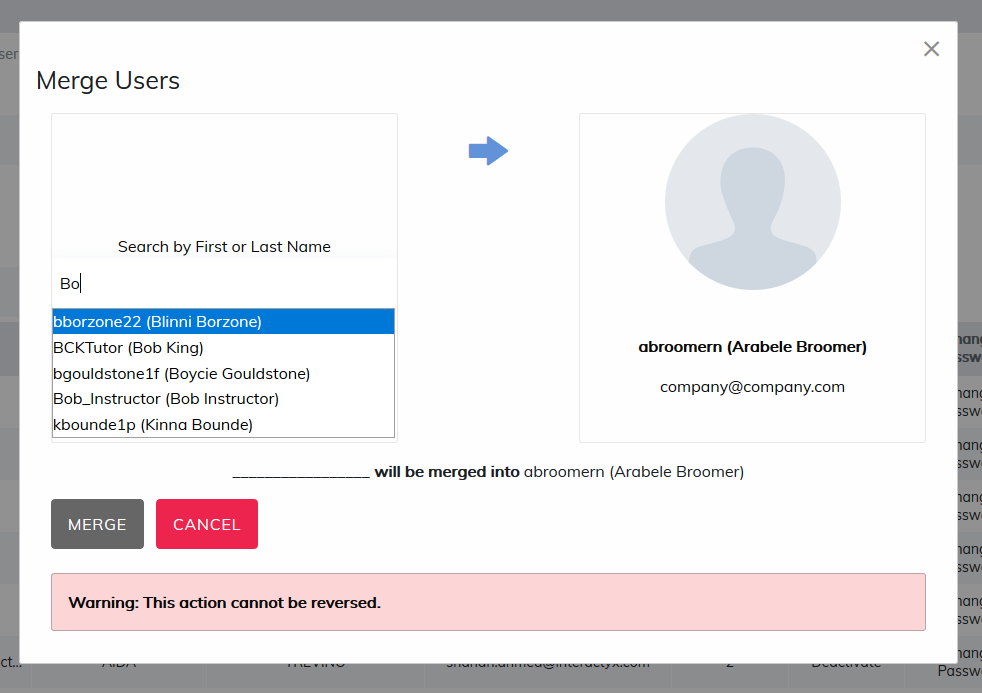
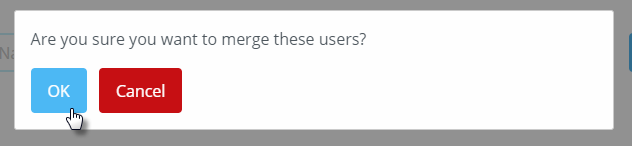
Once found, select Merge. A confirmation will appear. Selecting OK will merge the two users and delete the secondary account.
There are a few aspects to consider when choosing which account should be the primary and which should be the secondary when deciding to merge accounts.
- After the merge, the secondary account will be deleted. The user will only be able to login with the primary account's username and password.
- If both the primary and secondary accounts contain the same enrollments in the same courses, the primary account will take priority. All other enrollments will be added to the primary account as a historical enrollment.
- The only exception to this will be if the secondary account has a completed status for an identical item the primary account only has a registered status within. In this instance, the learner’s transcript will reflect a completed status and the primary accounts enrollment will be made historical.
- All primary accounts profile data will be maintained.
- Any unique enrollment data, competencies and other program, course, and material registration data associated with the secondary account will be applied to the primary account.
- This process is permanent and cannot be undone. The duplicate account will be deleted.
- A user cannot be merged or deleted if this user is creator of at least a material, a course instructor, or a program instructor. If they are one of these, then they can not be merged until these settings have been updated.
Deleting an Existing User
To delete a User, click on the red X.

A confirmation message will appear. Clicking OK will delete the user Clicking Cancel will cancel the request.
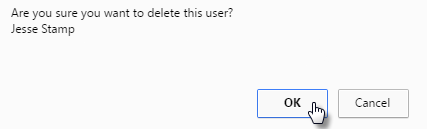
Note: if a user has multiple roles, each role will need to be deleted separately if you wish to remove the user from your site. If a user has both an instructor and learner role, deleting the learner role will keep the user in your site as an instructor.
Roles
As an administrator, when creating new users, up to four roles may be given to each user you create.
Learner: May complete courses, programs, materials, and learning paths. They can view their own reports.
Manager: There are two options, and only one may be selected.
- Manager
- May manage a user group, add learners to the user group they manage, and complete courses, programs, materials and learning paths.
- Managers only see their learners in reports as default.
- You can allow Managers to see all reports for learners they manage including other groups they may be in. Contact us for more details or to enable this option.
- Marking Manager
- Has the privileges of a Manager in addition to grading assignments created in the site.
- Note: Managers cannot register for content. Managers may only register for programs, courses and materials with a learner role. They cannot register with their manager role.
Instructor: There are two options, and only one may be selected.
- Instructor: May create courses, programs and load materials to the site.
- Evaluator: May create courses, programs and load materials to the Site in addition to being able to add learners to the site.
Administrator: There are two options, and only one may be selected.
- System Administrator: This is the highest level in your site. The system administrator can do everything including changing the default site settings and email settings for this site.
- Site Administrator: They can manage everything in the site except site settings and email settings.
Edit a User
Click on the username you want to edit. You may add or change profile details and modify role permissions. Edit the fields and click Save.
Note: If your site is using Single Sign-On (SSO) or an FTPS file transfer, please check the user settings in the external software that's sending the file as the user fields in your site are subject to change based on what is being sent through these methods.

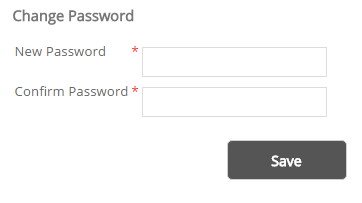
Changing Passwords
Administrators may change any user password by clicking Change Password for a user.
The administrator will be required to add a new password for the user and notify the user of their new password. If the site has the automated email option set to notify users of password changes they will receive this notification as well.
Login Activity
Administrators may view their users login activity at any time by clicking the Login Activity link.

If desired, provide a From Date and To Date to view login activity for this user. Alternatively, click Generate to view all login activity for this user.

Was this article helpful?
That’s Great!
Thank you for your feedback
Sorry! We couldn't be helpful
Thank you for your feedback
Feedback sent
We appreciate your effort and will try to fix the article