This article outlines how to create a course and add content to it. Please note that you must be logged in as an Administrator or Instructor to create a course.
1. Select the Admin Tab
2. In the Manage Courses section, select Manage Courses.
3. Select Create Course at the top of the page

4. Enter Course Details.
- On the course details page, enter the course name and then move down the page filling in the details you wish. Only items with red asterisks (*) are required.
- When creating a new course, please give it a unique name.
5. The Description and Display image: The Catalog (short) description will display on the Catalog page. The Home page description is your syllabus. Think about your course objectives, learning outcomes, subject matter expert details, etc.
6. Pricing information appears on eCommerce sites.
7. Timelines: Enter a course start and end date.
- If you enter an end date, the course will expire on that date and remove all learners that have not completed the course from the roster, they will not be marked complete.
- If you leave the end date blank the course will not expire.
- If you choose a fixed length (e.g. 30 days), the course will be available to the learner from the date he/she enrolls for the number of days indicated. At that time, if the learner has not completed the course he/she will be removed from the roster and will not be marked complete.
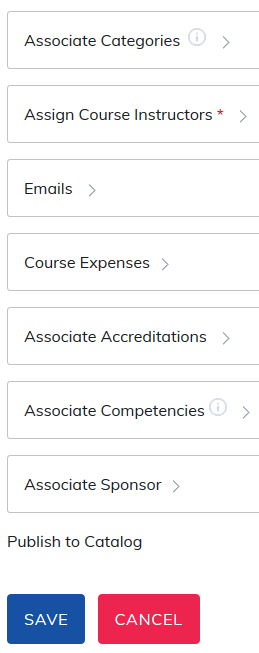
8. You may also choose to associate a Category with the course. If you associate a category to the course the category will display on the catalog page.
9. You must associate an instructor to the course.
10. Emails, Course Expenses, Accreditations, Competencies and Sponsors are all optional items you may choose to add.
Please remember to save all the course label details that you are entering. This can be done at the top or bottom of the page.
Add Course Content: Now that you have created your course you need to add Content.
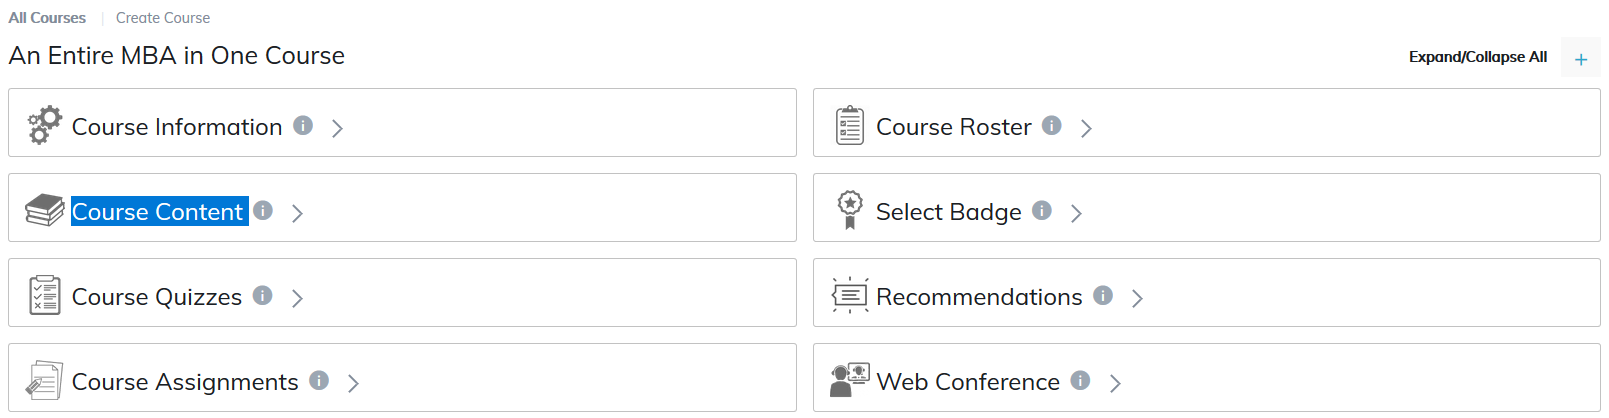
Manage Course Content items will show up in the course tree when it is attached to the Course. To attach Course Material to a Course:

1. Attach material to the course tree. You have a few options.
- Label: A Label can be used for many different purposes, such as embedding content, creating links to a website, or separating items within the Course Content Box. Videos added directly to the editor needs to be 200MB or less.
- Quiz: Created in the Quiz tool
- Assignment: Created in the Assignment tool
- Materials: Loaded into the Manage Material area. Content can be documents, audio, video, SCORM, & xAPI formats.
- Web Conference: Platforms supported included GoTo Meeting, GoTo Webinar, and WebEx Meeting Center.
- Learning Tools Interoperability (LTI): Attach LTI content.
- Learner Choice: This option allows the learner to choose which item to attempt to complete the course when presented with two or more options. This is often based on language.
- Knowledge Checks: This feature allows instructors to release follow-up content to learners on a timed basis after course completion. These timed check-ins help learners reinforce and validate their knowledge while giving instructors insight into long-term retention and comprehension.
Note: If you have not already uploaded course material, go to the Admin panel, Manage Materials and select Upload Materials to add content to your site.
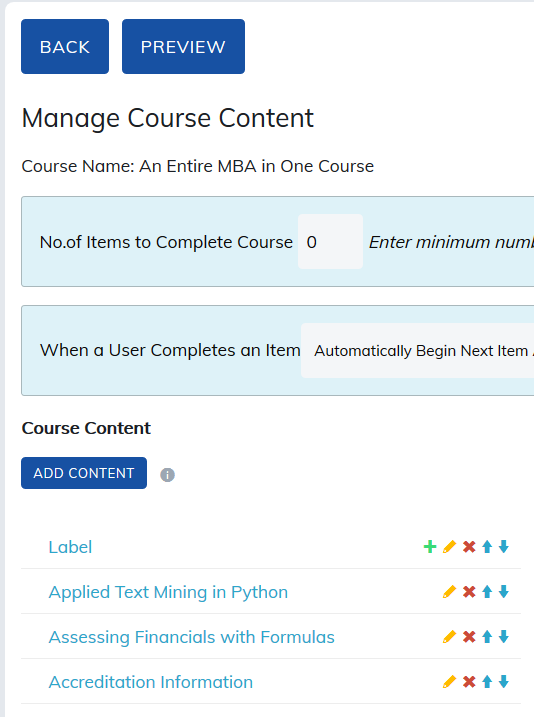
2. Notice it is also possible to select course material to add to a course label. This will make up heading on your course tree.
3. Use the arrows to move your content up or down in the course tree.
4. You can preview the course material as you add content to see exactly how it will appear to learners.
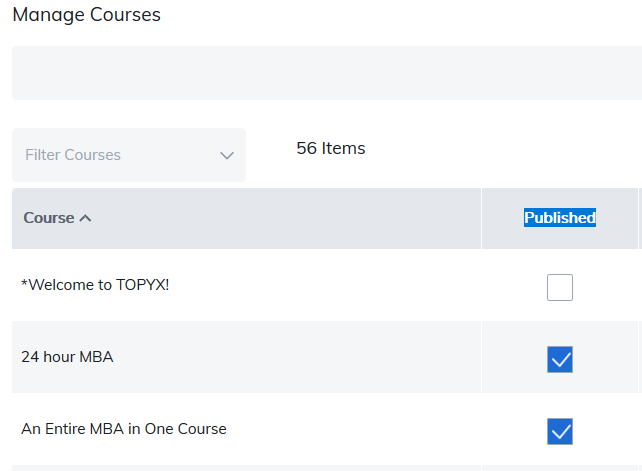
Note: If you cannot see the course listed in the Catalog (and you want to see it), go to Admin, Manage Courses, click Published.
Was this article helpful?
That’s Great!
Thank you for your feedback
Sorry! We couldn't be helpful
Thank you for your feedback
Feedback sent
We appreciate your effort and will try to fix the article